While an initial introduction to containers and devops tools is simple, developers need practice integrating the tools in a way that allows them to experiment on their local machine.
Examples and Hello World projects for single tools are accessible and easy to run locally. Connecting tools together is often done for the first time in a real project. Having a playground to experiment with integration on your local machine speeds up training and enables discovery outside the limits of an existing project.
The Playground
The goal is a learning project with a focus on Terraform+Ansible integration. Docker is ubiquitous enough to earn a spot as our stand-in cloud.
Organization of the playground is focused on a runnable starting point rather than a demonstration of how large use-cases should organize their code and files. We’ll make note of those best-practices when we get to forks in the road.
Terraform + Docker
Docker is an odd sight in this stack. In most cases Terraform would create cloud VMs instead of local containers, which would be provisioned by Ansible.
Alternatively if the stack is focus on containers, it would probably install on a platform like Kubernetes which would be deployed to with Helm Charts.
The Terraform stack for a few Docker containers is simple enough with the Terraform provider kreuzwerker/docker.
Here’s a stack defining a single CentOS container.
1
2
3
4
5
6
7
8
9
10
11
12
13
14
15
16
terraform {
  required_providers {
    docker = {
      source  = "kreuzwerker/docker"
      version = "2.16.0"
    }
  }
}
# Create a container. See (https://registry.terraform.io/providers/kreuzwerker/docker/latest/docs/resources/container)
resource "docker_container" "container1" {
  image             = "centos:7"
  name              = "container1"
  must_run          = true
  rm                = true
  tty               = true # Keeps the container alive
}
Ansible Inventory
There are multiple ways of connecting Terraform and Ansible. A key factor in deciding which approach to use is the dependency direction between infrastructure.
Dynamic Inventory
In a production environment, an Ansible Dynamic Inventory is often the best choice. Connecting compute resources created through Terraform with Ansible this way makes for a clean interface.
Tags on VMs can be used as Ansible groups when using a dynamic inventory. Which means the contract for Terraform only knows about tagging requirements and knows nothing of Ansible (and vice versa).
You can even use a dynamic inventory based on Terraform state (spectacular stuff! 🎉)
Generated Local_file vs. Output
For our playground, the Ansible inventory will be a Terraform output. This is so we can flex Terraform muscles while still keeping a clean interface with Ansible.
Notice that the inventory could be a “local_file” resource or an output. Terraform doesn’t know how inventory will be used; local_file resources complicates things when dealing with the cloud and CI/CD platforms where the inventory file may not be needed.
Moving the step of saving the output content to file away from Terraform means fewer assumptions on when and how the inventory is retrieved.
For a local playground either option is fine. This post will use output. When using an output, save the inventory to a file using
terraform output -raw <name of output>
Remember, composition! If you find yourself in a situation where submodules are generating inventories, then there’s a good chance you’re creating an unfortunate dependency. Your inventory should only be known to your top module.
Inventory Content
YamlEncode
An initial inventory can be specified directly in HCL encoded to YAML. HCL looks enough like YAML to follow the standard Ansible inventory tutorials while keeping the HCL IDE features present such as autocomplete.
1
2
3
4
5
6
7
8
9
10
11
12
13
# Create inventory file in yml format
# See (https://docs.ansible.com/ansible/latest/user_guide/intro_inventory.html)
resource "local_file" "ansbile_inventory" {
  content = yamlencode({
    all : {
      vars : { ansible_connection : "docker" }
      hosts : {
        container1 : {}
      }
    }
  })
  filename = "inventory.yml"
}
Static INI Inventory
The equivalent INI based Ansible inventory is
1
2
3
4
container1

[all:vars]
ansible_connection=docker
A manually created INI file is a good alternative. Both cases have the follow-up steps of implementing looping over the hosts. The static INI inventory becomes a template while the yamlencode inventory is built with HCL functions.
A YAML encoded inventory will lead to learning on HCL language skills when in using the playground.
Use a static file to explore more advanced Ansible inventory uses independently from HCL.
For example, using the yamlencode approach one can loop over AWS EC2s and build an inventory with zipmap()
1
2
3
4
5
6
7
8
9
10
11
output "ansible_inventory" {
  value = yamlencode({
    all : {
      hosts : zipmap(aws_instance.workers[*].tags.Name, [
        for ip in aws_instance.workers[*].private_ip : {
          ansible_host : ip
        }
      ])
    }
  })
}
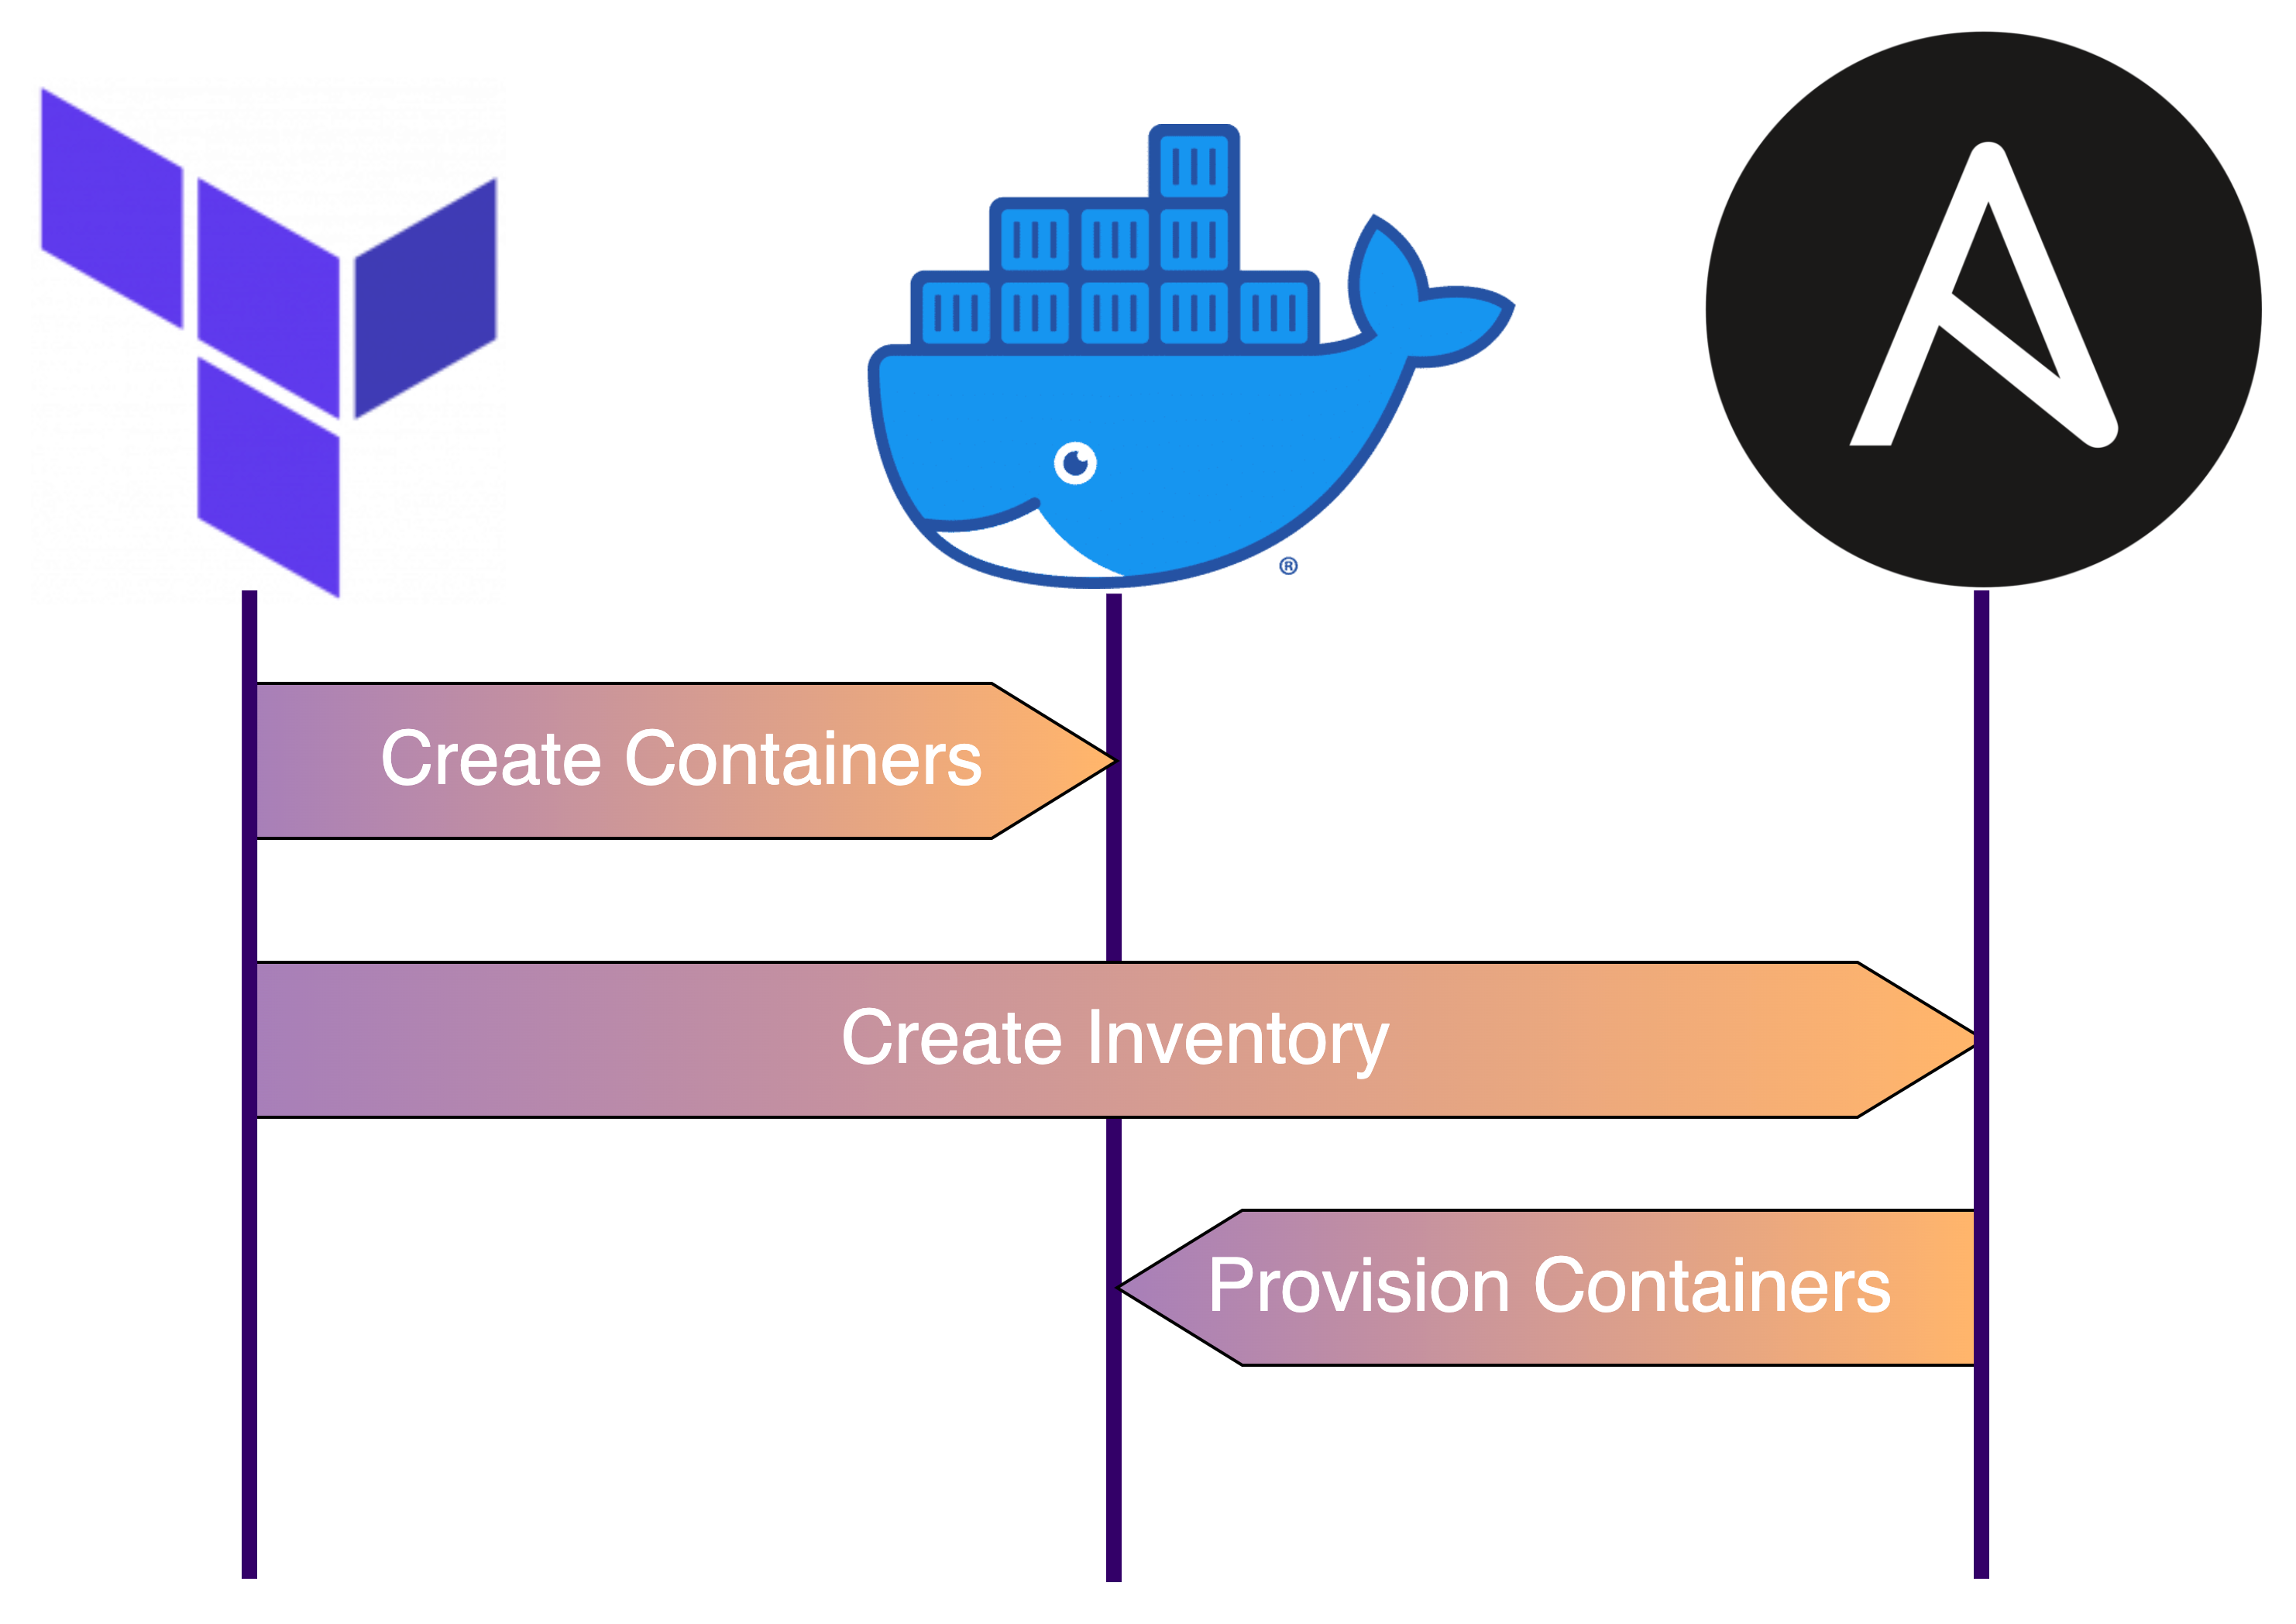
Integration
Terraform and Ansible serve complementary responsibilities. Terraform creates infrastructure resources and Ansible provisions resources.
Since Terraform is capable of executing commands on remote hosts, the line between these responsibilities should be kept clear. A useful guide for drawing the line is:
Terraform stops once the resources are accessible.
Setting up SSH and installing configuration-management agents (i.e. Chef or Salt) are Terraform responsibilities. Updating packages and configuring additional user accounts are Ansible responsibilities.
Mono-repo vs. Multiple projects
Since the playground files are small and portable, we’ll keep the files in the same project. This mono-repo approach provides flexibility to experiment. The downside to this flexibility is that it blurs the lines of responsibility.
Using separate projects enforces boundaries. READMEs in each project make the interfaces clear to new collaborators. And if desired, a directional, versioned dependency can be added with Git Submodules.
For the playground, we’ll use a mono-repo. The project will be organized as standard Ansible project with an additional infra directory for the Terraform stack.
1
2
3
4
5
6
7
playground
    ├── .gitignore
    ├── README.md
    ├── site.yml          <-- Ansible playbook
    ├── inventory.yml     <-- Inventory (not tracked in VCS)
    └── infra             <-- Terraform root
        └── main.tf
Ansible Playbook
We’ll start with a minimal Ansible playbook.
1
2
3
4
5
- name: My Ansible Playbook
  hosts: all
  tasks:
    - name: Hello World
      ansible.builtin.command: echo Hello World!
Docker containers do not function easily with systemd. Be aware that roles, such as this Apache server role may fail to run targeting a Docker container.
Using the Playground
The working directory for all commands is the project root.
1
2
3
4
5
6
7
8
9
10
11
12
13
14
# Initialize
terraform -chdir=infra init

# Apply the stack
terraform -chdir=infra apply

# Save the inventory file
terraform -chdir=infra output -raw ansible_inventory > inventory

# Ping the machines with Ansible
ansible all -i inventory -m ping

# Run the playbook
ansible-playbook -i inventory site.yml
You can view the code here.
Next Steps
The playground is a good starting point. Here’s a few things to try next:
- Create multiple containers and build the inventory dynamically
- Switch the inventory to use SSH instead of a Docker connection
- Expand the Terraform module with output.tf, terraform.tfvars, etc
- Apply the Terraform stack from the Playbook with the Ansible Terraform Module
- Add VirtualBox VMs to the stack using the Terraform Virtualbox Provider
- Create groups for hosts in the inventory
- Add Ansible role dependencies via Ansible Galaxy and
requirements.yml - Use the dynamic inventory based on Terraform state instead of a Terraform generated inventory